In this tutorial we will show you how to setup FileZilla FTP client to upload your files to our server. You may use any other FTP client, the setup is very similar.
You will receive the FTP login details via email when your hosting account is activated.
- First, download and install FileZilla FTP Client. (NOT SERVER)
- Open the software.
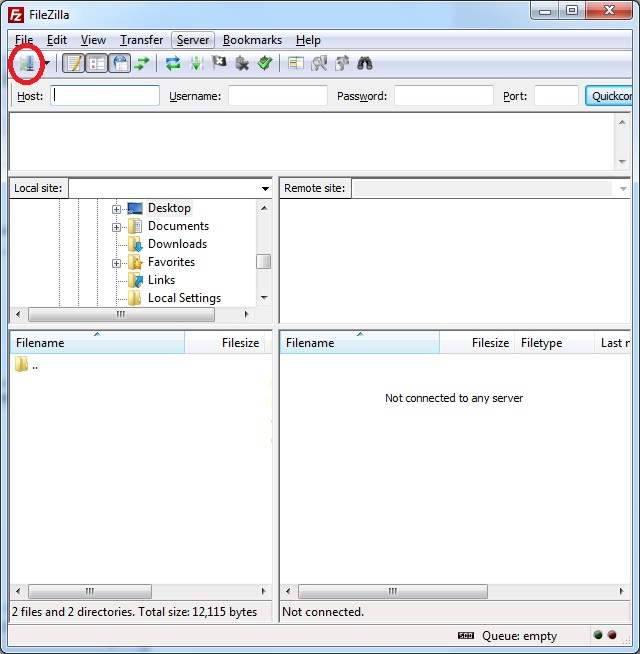
- Click Site Manager icon at the top-left corner
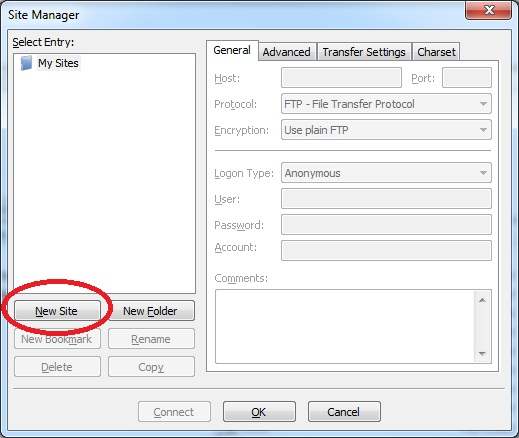
- In Site Manager pop-up box, click New Site
- Enter your FTP details
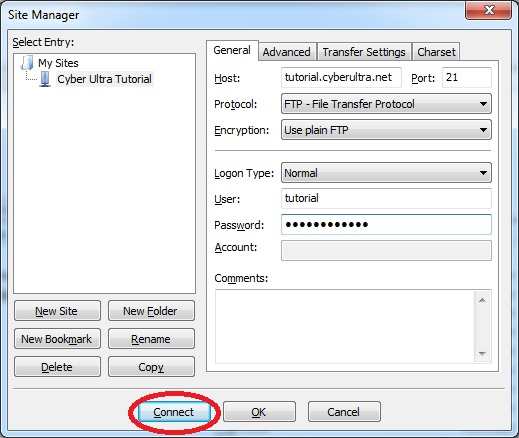
- Rename the site name to anything you like
- Host: Enter your domain name, or IP address if your domain is not yet pointing to our server
- Port: 21 or empty
- Login Type: Choose Normal
- Enter your FTP username and password
- Click Connect
- Once connected, double-click public_html folder in the right panel
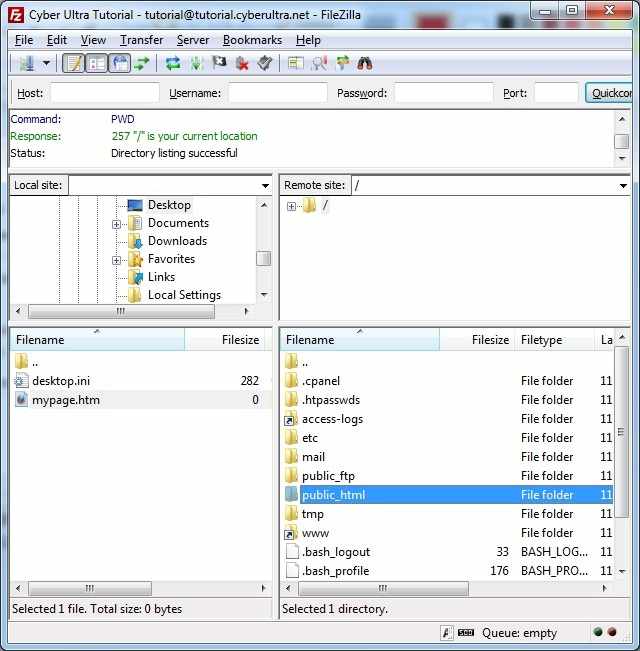
- In the left panel, find and right-click the file you want to upload
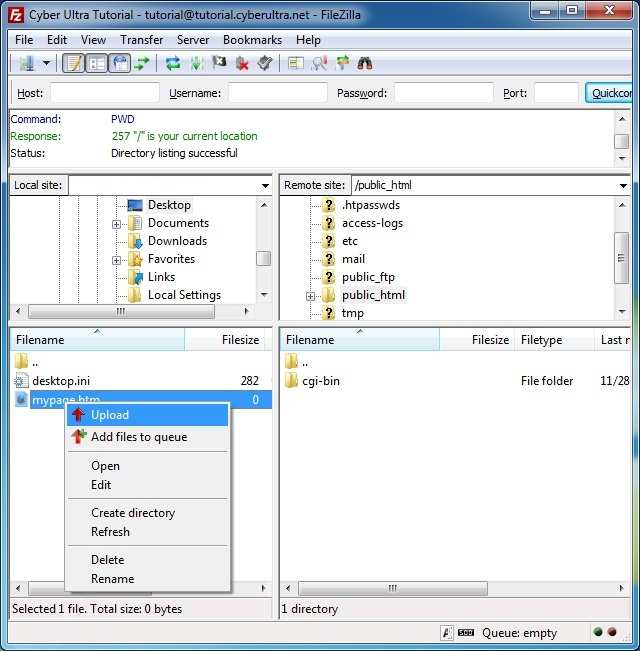
- Click Upload
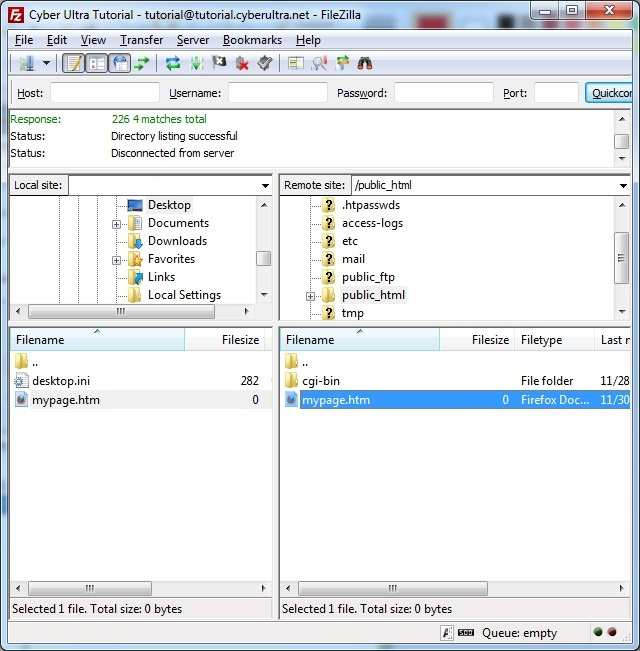
- File is now uploaded. Accessible at http://yoursite.com/mypage.htm (replace yoursite.com with your domain name)
NOTES:
- Only files uploaded in the public_html folder will appear in your web site
- The down arrow next to the Site Manager icon shows a list of saved FTP sites, use it for fast connect.
